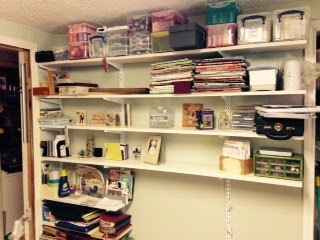
Many of my stamp supplies has been boxed up and put away while waiting for a new floor.
So, I thought I would share something I made several years back.
I love to make handmade books.
The cover, spine and pages can be adapted to make any size book.
I designed and made up my own instructions.
My daughter owns and operates an antique shop in Southern Kansas. She brings me things to use in my artwork. This is how I came about using game boards for the base of my books.
Supplies:
Distress ink (vintage photo)
Kraft Paper
Rubber stamps
Archival ink (black)
Glossy Card stock
Zutter Bind-it-All
5/8” Owires
3M Spray Mount Artist’s Adhesive
White card stock or 14pt file folders
White 2" masking tape
Paper trimmer
12” Tim Holtz ruler
Studio Multi-Medium
(adhesive)
Martha Stewart score board
Cutting Rotary Mat
Craft mat knife
Game board or heavy duty cardboard
This booklet was made for my #8 finished tags; 3 1/8” x 6 ¼.”
Instructions:
1. Cut scrabble game board into two pieces down the center fold with a craft knife. Set one aside for another booklet. Each piece is now seven inches by fourteen inches long. Place one piece down on rotary mat. Use mat cutter with metal edge of ruler to cut front and back book pieces. I cut one piece from left finished seam and one piece from the right finished seam, and then the seam binding and spacers from remainer of game board.
These measurements are:
2 pieces 4” x 7”
1 piece 1 & 1/4” x 7”
2 pieces of game board as spacer
Set aside for now
Note: For safety, please use a new blade when cutting the game board or thick book board.
2. Cut a 10” x 14” piece of Kraft paper; crumble the paper with your hands (try not to tear the paper as you crumble,) smooth out, crumble several times and then smooth out. Spray one side of Kraft paper with adhesive outdoors or in well ventilated area. Leave outside for a little while, bring in and place down on craft table adhesive side up.
3. Place the pieces of game board down over the adhesive. Allow an even space between the front, back and spine using the spacer pieces. (As seen in photo)
4. Use scissors to cut all four outside corners on a diagonal.
5. Crease and fold all edges inward.
6. Measure and cut one piece of masking tape 2 inches by 7 inches, cover the inside of spine. Cut another piece of white masking tape 2 inches by 9 inches long, add to outside of spine and continue to inside of spine. Press down until smooth.
7. Cut two pieces of Kraft paper and glue on inside to cover up scrabble game board.
8. Use Vintage Photo distress ink direct to color the book cover and on the inside. Or finish as desired.
9. Use paper trimmer to cut two pieces of card stock 4 3/8” x 6 3/4.” This will be the inside front and back face cover.
10. Use Bind-it-All tool to punch 12 holes in these two pieces as directed on instructions.
11. Next, use score board to crease a valley folds ¾” on front and back pieces.
12. Cut 12-15 pages of card stock 3½” x 6 ¾”
13. Use the instructions from the Bind-it-All to punch hole into each page
14. Make a stack with one page (mountain fold) 4 3/8” x 6 ¾”, 15 cardstock pages 3 ½” x 6 ¾” and then one page (mountain fold) 4 3/8” x 6 ¾” together.
15. Use tool to cut 5/8” Owires 6 inches long. (12 wires)
16. With the stacked pieces of cardstock place them in the Bind-It-All and then bind together. When you have the owires and paper together they will look like the photo below with valley fold of front and back pieces and pages in the middle.
Note: The ends of wires will not be seen they will be under the card stock next to spine.
17. Insert the pages in center of center spine. Close the booklet and check that the Owires are at the center of booklet. Open carefully and glue one side at a time, and center the booklet with even spaces on both sides with valley folds at folds of spine.
Note: Glue the inside front and back pieces with the valley folds in center of booklet, I used a credit card with Studio Multi- Medium as an adhesive. Smooth with Speelball 4" Baren until it is smooth and applied to book. (Rubbing with your hand will do as well to get a smooth finish)
18. Final step: Embellish your booklet!
Have fun making your booklet!!
Comments Aprreciated!!


