Friday, May 4, 2012

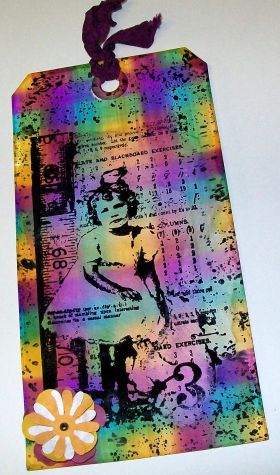
CC2C#4 Faded Layers


Linda chose page 43 with Tim's Compendium of Curiosities Vol. 2 to create a project using Faded Layers Technique.
This is my tag using Tim's technique and finished it off using a new stamp set that arrived this week. 


Imagine

 Simon Says Stamp and Show says to make a project with lots of colour; A Kaleidoscope of Colour! http://simonsaysstampandshow.blogspot.com/2012/04/simon-says-stamp-and-show-kaleidescope.html
This is my challenge entry using an image from Dyan Reaveley's stamp set, face image is from Onyx Xpressions, backgound was made with Memories Mists.  The doodle parts were inked with archival black, cut-out and then water-color with a waterbrush.
 Thanks for Looking! 

Thursday, May 3, 2012

CC2C#3 Whimsy

Linda is hosting a new challenge from Tim Holtz's newest book; Marbled Stain.

For my challenge I made the technique and then followed it by using a variety of Tim's oldest and newest stamps and distress inks. I also used mica flakes and a little stamp I bought years ago that is in the bird's mouth.
Thanks for looking and have a creative day!

Thursday, April 19, 2012

CC2C#1 Butterflies

It's time to start working on our challenges with Compendium of Curiosities 2.
Linda gave our first CC2C#1 challenge from page 66; creating our own custom stamps. Our sponsor, http://www.simonsaysstamp.com
I used the supplies required to enter this challenge along with several distress inks, stamps, two butterflies using custom stamp pads from Creative Chemistry 101, perfect pearls mist; heirloon gold and forever green and archival inks. All the supplies were applied to a time sheet paper that I made into a tag with Tim's bookplate and tag die.


Wednesday, April 18, 2012

Golden Trumpet


This set of images are perfect for Copic, brush and distress markers.
I inked the flower stamp with archival black ink and then used several colors of perfect pearls spray, distress ink, new distress markers and a background stamp on the tag.

Sunday, April 8, 2012

Butterfly Wings


The quote:
"the child born on the Sabbath day
is fair and wise and good"

The digital images are from Lisa's Altered Art. http://lisasalteredart.com/ 
This is the little #6 tag was made using some of the images along with a stamped background from my stash. Distress inks from Tim Holtz.

Saturday, April 7, 2012

12 Tags of 2012 ~ April Tag


I used a reflections stamp and texture fades embossing folder on the base of the tag like Tim used. The tag was distressed using a large variety of distress inks.
(Several were from his seasonal inks.)
 My sweet little blue bird and branch images was made with my Silhouette digital craft cutter.  
The teak wood "B" and metal word are from my stash of supplies. I used several colors of Tim's dabber paints on the little bird and distress powder on the branch.
The seam binding is from my vintage stash of supplies.

Friday, April 6, 2012

I Graduated from Creative Chemistry 101


These are the results from the online classes I took from Tim Holt Creative Chemistry 101.
It's not too late if you would like to join. Once you pay you have lifetime access to the videos and instructions.


Tuesday, April 3, 2012

Sunday, April 1, 2012

Easter Bunny

 Last week I viewed Tim showcasing his bunny tag using his cute little bunny die with his paper stash.

This is my version using my Silhouette digital craft cutter to cut the little bunny and bow with manila paper. After cutting the bunny, I took a pair of scissors to make it look like it had two ears. I used Espresso dabber on bunny and Raspberry and Sunburst Orange Dabber on the bow then added Frosted Lace Stickles for sparkle.
The little bunny with Easter egg is from Seasonal paper stash. I lighted the image to give a brighter look.
I used a variety of distress inks on my Kraft resist tag made with the Bookplate and tag die.

Friday, March 30, 2012

Day 10 Creative Chemistry 101

I had a Tim Holtz stamp large enough to cover my tag for this technique. It's from the "book cover" stamp set CMS #103. This is Tim's Day 10 technique with Distress Stickles.

After viewing the first tag I decided to try this technique again before going to bed. It's after midnight here.
I changed the color combination on this tag and then added Tim's clear quote stamps.

I have really enjoyed the last two weeks viewing Tim's technique each day in the online classes. If  I need inspiration, I can view Tim's technique, artwork and videos again and again.
I'll probably never meet Tim in real life and doing the classes is like he was teaching me personally. Thank you Tim! Thank you Mario for the behind the scenes!

Thursday, March 29, 2012

Day 9 Creative Chemistry 101

Wow! what joy to make these this morning. With some of the inks still on the mat I was able to make more tags to use in the future.
I viewed Tim's techniques, then made it my own using Tim Holtz and Ranger products from my stash. Stamp in the middle from Hero Arts.
[After posting my tags together and seeing them on my blog, it looks like I used stamps in the last tag. I didn't.]
            Perfect Distress Mist, Pefect Distress and Perfect Splatter Distress Techniques

Wednesday, March 28, 2012

Day 8 Creative Chemistry 101


These are my Day 8 of Creative Chemistry 101 from Tim Holtz online classes.
 I used Ranger supplies and Tim Holtz stamps on all three tags. The third tag was made using the 1" Grunge Blocks from idea-ology.


Tuesday, March 27, 2012

Day 7 Creative Chemistry 101


These are my tags for Day 7 using Tim Holtz techniques from his online classes.
http://www.onlinecardclasses.com/timholtz/class-info/
I used Tim's technique but change the stamps and distress inks on the first tag. The second tag was made like Tim's. The third tag made using the same supplies although I used different colors of distress inks.


Monday, March 26, 2012

Day 6 Creative Chemistry 101

On my first tag I used Tim's technique with Marvy brush markers, butterflies and distress inks. I'm thrilled with the results but would rather use Tim's markers. They are on my wish list.
The base tag was made using Day 5 Creative Chemistry 101 marble technique.
http://www.onlinecardclasses.com/timholtz/class-info/

The second tag was made with the same stamp Tim used. To finish my tag I used brush markers with a portable waterbrush. The background technique used on this tag was made from one of the techniques from Tim's Compendium of Curiosities I.

The third tag I followed Tim's technique but used my markers with new stamps in my stash. The background tag was made using Day 5 Creative Chemistry 101 marble technique.

Friday, March 23, 2012

Day 5 ~ Creative Chemistry 101

These are my Day 5 tags from Tim Holtz on-line classes.
http://www.onlinecardclasses.com/
http://www.onlinecardclasses.com/timholtz/class-info/
I used a variety of TIm Holtz (Stampers Anonymous) images and supplies from Ranger on these tags.

Thursday, March 22, 2012

Day 4 Creative Chemistry 101

These are my day 4 of Tim Holtz Creative Chemistry 101 on-line classes. http://www.onlinecardclasses.com/
http://www.onlinecardclasses.com/timholtz/class-info/

Today's techniques:                Reinkers              misting               custom

Tuesday, March 20, 2012

Creative Chemistry 101 ~ Day 2

Sharing Day 2 from Creative Chemistry 101, an online class with Tim Holtz. The flower stamp in the middle tag is from Tim's #001 set. I bought the cling set the same year it came out.


                  http://www.onlinecardclasses.com/timholtz/class-info/                                                            

Sunday, March 18, 2012

Dance


This is a tag I made  using a stamped image from Stampsmith, designer paper, flourish die cut, and stamped words on ribbon from my stash. 
I inked the stamp image on glossy card stock with Plum Archival ink. Fibers were added to tag to finish.
Thanks for Looking!

Tuesday, March 13, 2012

Grungy Monday #39


Grungy Monday is coming to a close. Next time I'll be sharing techniques from Compendium of Curiosities II.
This week Linda ask us to do one of Tim's 12 tags of Christmas from 2009.

I followed Tim's technique using his "Nature Walk" set of alcohol inks. One of "the girls" from Tim's Stampers Anonymous images CMS #020 was used on this tag. I bought this set the year it came out. The specks are from one of Tim's Christmas 2010 sets.
Archival ink was used to stamps all the images on this tag. I used 10 pt. glossy card stock with Tim's bookplate tag die. The flowers were made using a variety of paper punches from my stash. The seam binding is from a vintage package that was originally priced for 10 cents.

Thursday, March 8, 2012

Grungy Monday #38

Linda ask us to step back to 2007 with any colors and imagery we wish and then post a photo of our creation on her blog.

I followed Tim's tag for the base of the tag, and then used a royalty free digital copy of a little girl from Class Act, Tim's tissue tape along the bottom with two rows, Tim's CMS 001-Stampers Anonymous flower image, an image from a discontinued stamp and coffee filter flowers made with Tim's tattered floral die. The flowers were inked with spun sugar distress stain. I brushed a thin coat of satin varnish on the die cut flower and a mini brad to hold the flowers together. I inked the seam binding with distress stain. Studio multi-medium matte was used as an adhesive.

Sunday, March 4, 2012

Mosaic Butterfly ~ Grungy Monday #37

Linda ask us to make wearable art using at least one Tim Holtz products for our Gungy Monday #37. I was inspired to make a wearable art pin after seeing Tim's tutorial: https://timholtz.com/12-tags-of-2012-march/

Supplies used:
Magnetic butterfly die, grungeboard, base tray, Vagabond, his Lost and Found paper stash, glossy accents and wonder tape. Tim used Ranger cement embossing powder, I used silver embossing. A self-adhesive pin back was applied to the back. I used the same "quickstik" tool Tim used. It works perfect for these tiny papers.


Saturday, March 3, 2012

12 tags of 2012 for March


I had fun creating this tag from viewing Tim's March Tutorial.


Supplies used: Tim's grungeboard, rubber stamp, butterfly die, paper, idea-ology, distresser tool, distress inks, perfect pearls mist, glossy accents, wonder tape and archival black ink. I used the same "quickstik" tool Tim used. It works perfect for these tiny papers.
The cement embossing powder is something I need on my wish list.
I used something I had in my stash for the grout. Even though it's not what Tim used I think it came out pretty good for the first time using this technique. After viewing Tim's tag again, I see I cut my pieces a lot smaller. I love the detail seen in real life using the glossy accents over the paper.

For the background I used a stamp from IBFS.
It doesn't seem possible that distress inks have been out since 2004. I recall buying my first Distress ink pad that year; a shop owner was showing how-to age photos using a nib and distress inks.