Welcome to my blog! I love to explore mixed media and paper crafting. I love to create for friends and family. Since 1993 I've been sharing card making, paper crafts, sewing and then since 1999 I've made tags, books, artist clay projects, jewelry using mixed-media art supplies that includes acrylic paints, mediums, brushes, rubber stamps, stencils, and more.
Tuesday, March 25, 2014
Sunday, March 23, 2014
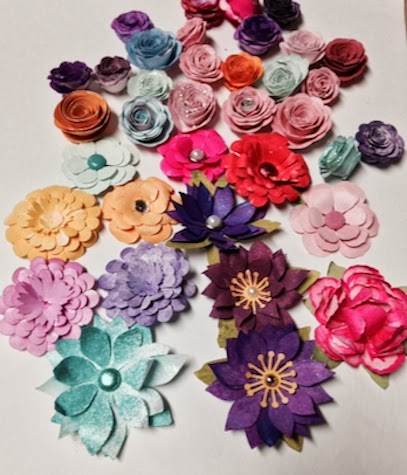
Paper Bouquet by Judy Cantrell
This is my third paper bouquet to make using Silhouette files by Jamie Lane Designs. The vase and flowers were made with card stock from Joann's and Tuesday Morning.
The glues used; Glossy Accents by Ranger and Quick-Dry adhesive by Scotch.
Wired ribbon from my stash.
Thanks goes out to those that left comments here and on my yahoo groups on these paper vases and paper flowers.
Wednesday, March 19, 2014
New Handmade Flowers and Vases
I love the wired ribbon used to make a bow around the vase.
The only thing other than paper, ribbon and glue is a sticker bling from Prima.
The third flower in background is a deep purple.
Finished size of vase: 6 1/2"
Flowers; 3 3/4" to 4 1/4"
Oh, and if you saw my previous post, it doesn't take me as long to make the vases and flowers.
http://wwwstampedimpressions.blogspot.com/2014/03/handmade-vase-and-flowers.html
Wednesday, March 12, 2014
Handmade Vase and Flowers
The flowers are approximate 3 1/2" across.
I bought the Silhouette files today to make this project; I used 3D peony, 3D Gerbera daisy, 3D large Mums, 3D 5 piece curvy vase. I used eight sheets of 12 x 12 inch patterned paper, lots of glue and a chop stick for rolling petals.
Finished height of vase 5 1/2" tall.
[Photo taken with my iPhone, this is how the flowers and vase looks in real life.]
Sunday, March 9, 2014
Thursday, March 6, 2014
My Handmade Paper Doll
Robyn Weinrib on Facebook gave a challenge using her commands; add music paper, old book page, paint, stamps, stencils, and then finish the foreground.
I completed the background this morning. And then started on the foreground.
I designed my first paper doll and then dressed her with patterned paper. She was drawn with a pencil on old book page and to my surprise, she is almost the same size as many of my Julie Nutting doll stamps from my stash. I'm calling my paper doll; Karin.
When I was 17 we wore hats to special occasions, the one I created here is similar to the one I wore to a tea. The dress and hat was made with Prima paper. The bling by Prima and Paper Studio. Flower was made with my Cameo. Stamps by Tim Holtz. Stencils by Retta and Crafters Workshop. Hair drawn with Faber-Castell Pitt artist pen. Archival black ink on stamped images and Alexander Art Gesso on the stencils. Vintage photo distress ink applied around the tag to finish.
Thanks for looking! And don't laugh too hard viewing my hand drawn paper doll. Love the background.
Tuesday, March 4, 2014
Little Girl with Stencil Background
Monday, March 3, 2014
All Dressed Up
These new doll stamps can bring out the kid in you.
This is Megan, she is one of the newest mixed media doll stamps by Julie Nutting. If you noticing something different, I replaced her boots for legs from another Julie Nutting's stamp called Strapless.I used a portion of patterned paper for my card front. I used spray inks in pink and turquoise and then grunge the edges with distress ink.
The stamped quote, border stamp and braided thread were also used on this card front.
Sunday, March 2, 2014
Tropical Travelogue
Are you ready to go to warm beaches or sunny poolside! It was a minus 11 wind chill while I was working on my tag today! We are expecting snow and ice later today. I got out my stamps that reminded me of warmth. I made my doll stamped image with a dark tan.
I made this tag using one of the patterned papers from Prima ledger pad. I used a Julie Nutting doll image from her new line of stamps. The girl image was enlarged due to being too small for me to work with. I like this size much better. She is from the set called Lots of Love. I cut away the portion where she holding an envelope.
I used several distress ink along with archival ink on background tag. Watercolors and oil pastels were along used on the doll stamp. Patterned paper from stash was used for her dress top. Graphic 45 Tropical Travelogue stamp set #1 was inked with archival black ink on background.
I made this tag using one of the patterned papers from Prima ledger pad. I used a Julie Nutting doll image from her new line of stamps. The girl image was enlarged due to being too small for me to work with. I like this size much better. She is from the set called Lots of Love. I cut away the portion where she holding an envelope.
I used several distress ink along with archival ink on background tag. Watercolors and oil pastels were along used on the doll stamp. Patterned paper from stash was used for her dress top. Graphic 45 Tropical Travelogue stamp set #1 was inked with archival black ink on background.
Tuesday, February 25, 2014
Welcome to Paris Tag
Sharing another tag this week using another Julie Nutting mixed media doll stamp by Prima and a long border stamp by Dylusions. My Phoebe doll stamp was stamped on 140 lb. Strathmore watercolor paper, added color with watercolor crayons and water brush, cut out and then dressed with coordinating dress, shoes and scarf. I put a tiny pearl bead in her hair.
The hearts border stamped image was inked with archival black. Welcome to Paris is a Prima image. Oh so French stamp image was inked and added to the tag by Prima. Use distress inks on tag to give a distress look.
The strings added on this tag were from a piece of fabric that was unraveling in my stash, I cut off some and added to my tag to finish.
Monday, February 24, 2014
Little Princess Card
Only one page from my 8" pad had the quote; There Lived a Beautiful Princess, it was folded in half and used on this card.
Julie Nutting newest image, Betty was inked on watercolor paper, cut out and then color was added to hair, shoes and skin tones. Designer paper stamped dress was applied to doll. Little Prima flowers were added along with a little piece of lace. Bling was added to flowers and her hair.
So simple to make.
Finished size: 4 x 8"
So simple to make.
Finished size: 4 x 8"
Friday, February 14, 2014
Happy Valentine's Day
I
Happy Valentine's Day
I just got this sweet little 2014 Julie Nutting stamp in the mail. She was inked on watercolor paper, cut out, and then I used watercolor crayons to color her shoes, hair, hair band, and skin tone. I used my Silhouette Cameo to make the stencil background and paper flowers. Viva Glitter Pen was used on the flowers although it's hard to tell from this photo. A pearl dot was added on Prima flowers and three more along edge of tag.
I used the stencil with distress inks to add color to my tag. Designer paper from my stash on the dress and bow in her hair. Bling, Viva Glitter Pen and Tim Holtz tissue paper was also used on this tag. The stamp quote is from Great Impressions; G261. White trim added to top of tag. I used one of Ranger's large manila tags, trimmed off 1/2" on length. Finished size 4 1/8" x 8"
Tuesday, February 11, 2014
Valentine Journal Page
I've created this journal page for my Tuesday blog post on Crafting with OWSE. You can see my tutorial here: http://craftingwithowse.blogspot.com/2014/02/a-special-for-friend.html
Supplies:
Stamps by Julie Nutting and Dyan Reaveley
Distress ink, Archival ink
Viva Glitter Pen
Flourish from Prima
Flowers and heart stencil by Cameo
Journal made using 140 lb watercolor paper and my Bind it All
Monday, February 10, 2014
Always
These are stamps you either like it or don't. But I think she is just too cute! I love creating the background with her stamps and sprays.
Chicken on left was inked over newsprint cut out and added to tag.
All stamps by Dyan Reaveley. Watercolor crayons were use with my water brush on the inked and stamped image in foreground, cut out and applied to my tag.
Friday, February 7, 2014
Steampunk ATC
This is one of the ATC I made for the mini envelope book I shared on February 5, 2014
Here is the link to book.
I used Graphic 45 and VLVS steampunk stamp on this ATC.
Wednesday, February 5, 2014
Steampunk Book with Graphic 45
Cover page
Sharing a mini-book I made with the following supplies from my stash.
These pages were made using Tim Holtz envelope and steampunk dies. Inside each envelope is an ATC with more Graphic 45 and steampunk images.
Graphic 45 papers was used with VLVS stamped images.
Each envelope was painted with my Gelli Printing plate, stencil and acrylic paint.
Bind it All tool was used to make the envelopes into a book.
This is a good project if you are snowed in.
2 of 8
3 of 8
4 of 8
5 of 8
6 of 8
7 of 8
Sunday, February 2, 2014
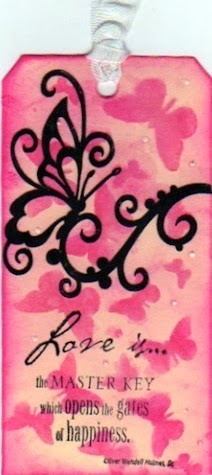
Love is...
I made this cute little tag for my sister. I hope she likes it.
I had a lot of fun making it with the bright colors of distress inks.
The butterfly background was made with a stencil from my Cameo and two distress inks on manila #8 tag. The butterfly image in black was also made by my Cameo. Stamped image was inked with StanOn black ink pad.
Saturday, February 1, 2014
Tuesday, January 28, 2014
Gelli Printing on Fabric
I found blue denim jeans and jumpers for 25 cents in clearance isle at my local thrift store.
After running the clothing through the washing machine and dryer I removed zippers, trim, buttons and bottom hem.
The pockets were saved. I left the pieces large to use in a patch quilt for camping or at the bench.
I used my Gelli plate, acrylic paint mixed with fabric medium and my stencils on denim.
It took some adjustment to see what acrylic colors would show on the denim.
After running the clothing through the washing machine and dryer I removed zippers, trim, buttons and bottom hem.
The pockets were saved. I left the pieces large to use in a patch quilt for camping or at the bench.
I used my Gelli plate, acrylic paint mixed with fabric medium and my stencils on denim.
It took some adjustment to see what acrylic colors would show on the denim.
Monday, January 27, 2014
Experimenting with Paper
Example #1
It all started with Tim Holtz Lost and Found double sided designer paper.
Dry brush Liquitex iridescent pearlescent paint over the blue designer paper.
White gesso over the iridescent paint.
This was done with a hit and miss technique with semi-dry brush of white gesso. Let dry.
Apply Distress Gathered Twig ink over the gesso,
with an inked foam blending tool, then spray with water and heat set to dry.
Apply Distress RipePersimmon ink over the gathered twig inked piece with an inked
foam blending tool, then spray with water and heat set to dry.
Apply Distress Aged Mahogany ink with an
inked foam blending tool, then spray with water and then heat set to dry.
.
This was done with a hit and miss technique with semi-dry brush of white gesso. Let dry.
Apply Distress Gathered Twig ink over the gesso,
with an inked foam blending tool, then spray with water and heat set to dry.
Apply Distress RipePersimmon ink over the gathered twig inked piece with an inked
foam blending tool, then spray with water and heat set to dry.
Apply Distress Aged Mahogany ink with an
inked foam blending tool, then spray with water and then heat set to dry.
.
I love the results of this and would never dream
it all started as Tim Holtz scrapbook paper if I hadn't done it myself.
(the color has not be enhanced)
Example #2
Example #3
In example #3; I sprayed Perfect Pearls Mist (Heirloon Gold) over example #2 tag and then heat set to dry.
Update:
This morning, I made this example using white card stock and supplies listed above!
Example #4
The possibilities are endless what you can do with your stamping supplies!
Do you love to play with ink and paper?
Wednesday, January 22, 2014
Spiral Love Booklet
Spiral Love Booklet
by Judy Cantrell
I made this booklet over two years ago, although it was never shared on this blog.
The inspiration came to me when I saw a book that spelled out words in my local craft store.
Each cover letter has its own pages behind it for jotting down notes or thoughts. I made this heart's gift using a variety of tools and supplies from my stash.
Finished size: 4” x 8”
Supplies:
Cuttlebug heart embossing folder
Vagabond
Base Camp Font Cartridge
Cricut Electronic cutter
Zutter Bind-it-All
Zutter Red Owires; ¾”
Zutter Wire cutter
Perfect Pearl pigment powder
Perfect Medium pad
Detail and dusting brush
Red, black and white cardstock
White copy paper
Paper flower punch
Paper trimmer
Clear Gel tacky glue
Instructions:
1) This small booklet comes together using four separate sections. Each letter has its on white pages.
2) Cut 8 precise pieces of red cardstock
a) 2 - 2 x 4,”
b) 2 – 4 x 4,”
c) 2 – 6 x 4,”
d) 2 – 8 x 4.”
3) Cut white pages slightly small for each 4 sets of red cardstock. I used 10 pages for each section.
4) Emboss front sections of each red cardstock with heart embossing folder.
Designers Note: Emboss the red front sections V and E twice.
5) Use detail brush to apply Perfect Pearl pigment powder to each embossed red cardstock. Use dusting brush to remove excess powder.
Designers Note: Perfect Pearls come in many fabulous colors; I used Perfect Pearl color for this project. Its luster was perfect for this project and doesn’t rub off because it has a binder in it.
6) Arrange red embossed front, white paper and red cardstock for each section.
7) Use Bind-it-All tool to cut holes in each section per instructions of this tool.
8) Use wire cutter to cut desired Owires. Apply per instructions of Owires to bind the booklet.
9) Cricut electronic machine and Base Camp font cartridge was used to cut the word “LOVE” 2 ½.” Adhere the L to the 2 x 4” piece, O to 4 x 4,” V to 6 x 4” and E to 8 x 4” piece. These can be straight across or graduated as I did on this project.
10) Use white cardstock to punch 3 flowers. Adhere to the letter O.
11) I hope you’ll enjoy making this project. Other words and names could be made with a little adjustment.
Friday, January 17, 2014
She Loves Flowers
When I placed my paper doll image on the tag, I didn't like the floral background paper around her face, I was pleasantly surprised how well it looked when I turned the tag upside down!
I used 3D dots to add my Julie Nutting stamped image to my tag. She was stamped on 140 lb. Strathmore watercolor paper, painted with Niji watercolor crayons, cut out and then dressed in scrapbook paper from my stash; the background portion of tag was made with Prima paper. The sticker flourish is from Prima, flower embellishment from Michaels and tissue tape from Paper Studio.
Oh, I forgot, I used a water brush with watercolor crayons to color the flowers and leaves on Prima paper.
Comments appreciated and always read!
Thursday, January 16, 2014
Life Is Good
Here is another tag using one of the fabulous stamp images by Julie Nutting, papers, flower and trim all by Prima.
Tim Holtz "life is good" from #155 was inked and added to trim.
Archival black ink by Ranger was used on all stamped images.
The finished tag 4 x 8.5"
Wishing the dress didn't look so pale, it's a lovely green.
Enjoy!
Tuesday, January 14, 2014
Life Moments
My tag was made with one of the cute little girl stamps from Julie Nutting, two of Tim's strip die cuts and one of his stamps. Other images from Prima 6x6" paper pads. Julie Nutting image was stamped on watercolor paper using Archival black ink. Scrapbook paper from my stash was used for her dress.
Thanks for Looking and have a nice day!
Monday, January 6, 2014
12 Tags of 2014 ~ January ~ Happy Birthday Tim
Happy Birthday Tim!
I used many of Tim's supplies on my January tag.
After viewing Tim's blog post I proceeded making my tag. I had the texture fade embossing folder Tim used but chose to use another texture fade embossing folder.
Vintage Photo stain was used on background since I didn't have pumice stone. I used mini clip to hold my type charm with the number 7 cut from tickets for Tim's Birthday.
Archival black ink was used with image from /CMS#132 on fabric trimming from my sewing stash.
Click on this link to view Tim's blog post: http://timholtz.com/12-tags-of-2014-january/
Supplies:
distress paint/black soot, distress stain/vintage photo. distress ink/black soot, ink blending tool, metal foil tape, archival ink/jet black. glossy accents, craft sheet, heat tool, grungeboard, chit chat stickers, tiny attacher, sanding grip, scissors, journaling tickets, type charm, sprocket gear, mini paper clip, stamp/CMS#132 and CMS#058, bigs die/pocket watch frame, movers & shapers die/sized circles, vagabond, #8 manila tag made with bookplate die.
Additional supplies: gears from hardware, and fabric trim.
Archival black ink was used with image from /CMS#132 on fabric trimming from my sewing stash.
Click on this link to view Tim's blog post: http://timholtz.com/12-tags-of-2014-january/
Supplies:
distress paint/black soot, distress stain/vintage photo. distress ink/black soot, ink blending tool, metal foil tape, archival ink/jet black. glossy accents, craft sheet, heat tool, grungeboard, chit chat stickers, tiny attacher, sanding grip, scissors, journaling tickets, type charm, sprocket gear, mini paper clip, stamp/CMS#132 and CMS#058, bigs die/pocket watch frame, movers & shapers die/sized circles, vagabond, #8 manila tag made with bookplate die.
Additional supplies: gears from hardware, and fabric trim.
Subscribe to:
Posts (Atom)